The No-Dig Diary May 2018

There hasn’t been too much going on down the allotment for the last couple of months …… even been too cold for weeds and just a bit too wet to work!

In the meantime I have been puzzling over no-dig potatoes. How does that work? My initial solution was to avoid the problem by not growing potatoes this year. However the gardening fraternity are a generous lot and by April I had been asked to grow a row of spuds for a friend.
Up in Weston, the farmers also use no-dig but on a far larger scale. As it happens they are trialling no-dig potatoes this season, so of course I wanted to know how they went about it.

Translated into allotment terms, we start with some levelled ground and place our chitted potatoes on the surface at the usual spacing.

Level ground for potatoes

Next comes a layer of manure or compost or both.

Add manure on top of chitted seed potatoes

On top of this is a layer of straw. This will benefit from a good soaking once it’s in place.

Add a layer of straw

The top layer is grass cuttings – obviously not from grass treated for weeds & moss & such like ! The grass will rot down, and whilst its doing that, it stops the straw blowing about. Thinking ahead to pigeons etc. picking through all those layers, I covered the whole lot with some pea-netting.

Cover with grass cuttings

Apparently this method will produce potatoes that are a better shape and more regular sized that traditional cultivation. It also avoids stabbing your crop with the garden fork, because you don’t dig them up to harvest and should mean that rogue tubers don’t get left behind in the soil.

We shall see!

Annie
Why has my Rhubarb Flowered?

It feels like it’s happened a lot on our plots this spring, maybe more so than usual, but quite a few rhubarb plants have sprouted flower stalks. Poor rhubarb, it’s only doing what comes naturally and that is to ensure it’s own propagation, but seeing a flower head sprout in your rhubarb patch is not something an allotment gardener wants to see.

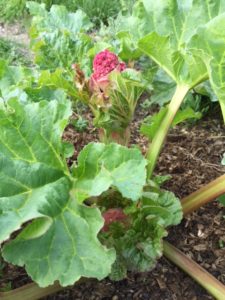
Flower stalk emerging from the centre of a crown

There are several possible reasons for this. Firstly it is more like to occur in more mature rhubarb plants where the crowns are at least three years old.
Some traditional, old-fashioned varieties are more prone to bolting  but if there’s one plant you are likely to inherit on an allotment, it’s a rhubarb and unless you plant a crown yourself, or grow one from seed, you are rarely likely to know the variety of the plant you have inherited.

As it is a spring vegetable (yes rhubarb is classed as a vegetable even though it’s most commonly eaten as a dessert), rhubarb does prefer cooler weather. This last winter has been cooler than some recent ones, particularly with the amount of snow we have had, but combine that with the warmer temperatures we’ve had this month, and it might just confuse a plant enough to think ‘Hey! I need to produce some seed!’

The main reason why allotment gardeners want to avoid their plants producing flower stalks is that in doing so all the plant’s energy is diverted towards producing that flower stalk and away from producing leaf stems. And when the only reason you are growing a plant is to harvest its leaf stems, that’s not what you want to happen. It will also weaken the crown as a result.

So what can you do if you find your rhubarb has bolted? The first thing is to cut out the flower stalk straightaway and do so as close to the base of the plant as possible. Use a knife as the stalk is thicker and harder to remove by twisting and pulling as you would do when harvesting the leaf stalks.
Ideally you want to remove those flower stalks as soon as you spot a seed pod forming. Again use a sharp knife to cut it.

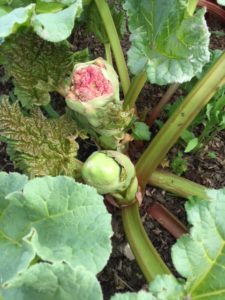
Flower stalk and seed pod
Seed pod emerging

If your crown is a few years old, dividing it when it’s dormant over the winter will ‘reset’ the maturity clock and should ensure it doesn’t bolt again for a few years. In fact dividing your crown every five or six years is good practice anyway.

And if you’re too late and you have a lovely long flower stem? Cut the stalk out as before. Apparently rhubarb flowers last a long time and make an unusual flower arrangement!

What to Sow in April

It may seem strange to be writing a post about what to sow in April, when April has nearly been and gone. However, this year has been a classic example of allotment gardeners needing to be guided by the weather and not by what it says on the back of a seed packet.

Normally, you would be able to sow most things from the end of March and into April. Generally the ground has warmed up sufficiently for seeds to be sown outside on our plots if they are being sown direct. However, if you remember, mid March saw a blanket of snow here in Hertfordshire which put paid to any idea of getting the season started for several weeks. The weather has improved greatly since, to the extreme of having a mini heatwave a week ago.

So what can you do when the weather is so up and down? Fleece or mini polytunnels can be used to warm seed beds and areas where direct sowing is going to be taking place, and can also be employed if the overnight temperatures plummet.

Root crops such as beetroot, radish, early carrots and parsnips can be sown this month. Make a narrow drill and sow the seeds thinly, cover up, water and hope! I often feel my first sowings don’t take. Beetroot can be started off in modules if you prefer and then transplanted once they have put on a bit of growth. Some people sow radish and parsnips in the same row. Radish will germinate quickly and can often be harvested before the parsnips (which are particularly slow to germinate) get going. I like to sow my parsnips in groups of three. The seeds are quite large and relatively easy to handle and if you get a little cluster of similar looking ‘weeds’ growing, you know it’s the parsnips!

Brassicas can also be sown now either in a seed bed or in modules. Whilst they are quick to germinate, they can be a bit high maintenance after that and don’t like being moved too often and then there’s the constant battle against the dreaded cabbage white butterfly and white fly.

If you are growing flowers, many of these can be started now. Some require direct sowing whilst others prefer to be sown in modules.

News from the Plots – March 2018

Well March has certainly been a difficult month for allotment folk with snow and freezing temperatures on two weekends with the Beasts from the East blowing in. Milder weather may have followed but this has resulted in a lot of rain, especially towards the end of the month.

The Clothall Road site in the recent snow

With Mother Nature against us, it’s been hard to make progress on our allotments with even the quick draining soil at our Clothall Road site being too heavy and wet to do much digging.

Traditionally here in the south we’d be able to plant out first early potatoes that have been chitting nicely at home but many members have been loathe to plant them out with the ground so wet.
The colder temperatures have also meant the ground has been too cold to sow anything outdoors so many of the veg you can often risk sowing a row of in March, like carrots and parsnips, are still snug and warm in their seed packets.

It looks like there is warmer weather on the horizon so hopefully we can all get the growing season started soon.

Spring Working Party

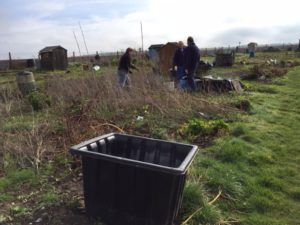
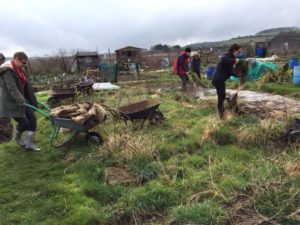
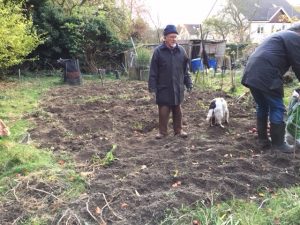
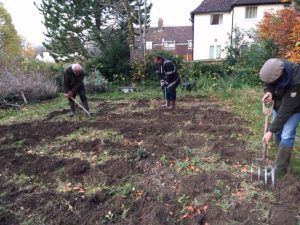
We were finally able to hold the spring working party at Clothall Road on Good Friday, having previously had to postpone the work from St Patrick’s Day, when it snowed all day!

It was good to see such a good turnout of BALGA members and the saying ‘Many hands make light work’ ran true as we had cleared rubbish off the various plots that we were working on within an hour.

Clearing rubbish from vacant plots
We recently had a delivery of wood chip delivered to both sites and this was also used to repair some of the paths

Repairing worn paths

We can now arrange for these vacant plots to be let to people on the waiting list and the site will be fully let again.

A big thank you to all the members who came alone and helped.

Recipe for a quick and easy potato salad

Recipe for a quick and easy potato salad

Ingredients
Salad potatoes such as Charlotte
1 tub of cheese and chive dip

Method
1. Cut potatoes in half or quarters so they are all similar sized pieces.
2. Boil potatoes as you would do usually and drain once cooked.
3. Place cooked potatoes into a bowl and add several spoonfuls of dip.
4. Stir to ensure all the potatoes are covered.
5. Serve immediately or allow to cool before eating if preferred.

The No-Dig Diary Jan/Feb 2018

BALGA tenant, Annie, updates us on her progress with experimenting with going no-dig. This month….paths!

‘Of course, no-dig doesn’t mean no work! The digging is delegated. You may do this already of course – you may have a co-worker or partner who loves the exercise! However you can still gain benefits from no-dig and find these heroes other important jobs on your plot.

With no-dig, the digging is done by the worms. Hopefully you have plenty, but you will certainly get a big influx with the arrival of all that lovely compost. The worms will draw the organic material into the soil and aerate it at the same time. As the soil is not being continually hefted around, an environment is gradually created that allows beneficial insects, microbes and fungi to thrive and prosper. As this happens, it gives the perfect soil structure for your fruit and veg.

However, there is still work to be done….plenty of compost to produce and distribute, but we don’t want to compact the ground so some paths would be useful.

There are several options for paths.
1. Grass paths. These look nice if well maintained. A grass path is fairly permanent though so perhaps other more temporary solutions would be useful to give flexibility year by year.
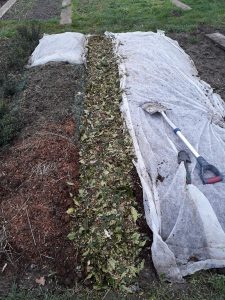
2. Walk on top of the compost.

Compost
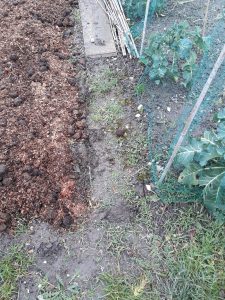
Trodden path

The mulch underneath should stop weeds and the compost layer should not get muddy for a long time – not until the mulch has been broken down by the worms. This should take much longer than on the beds since you are walking on it and compacting it more than the beds.
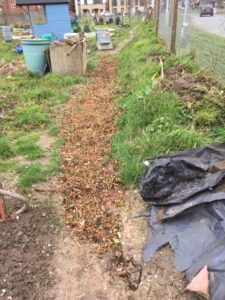
3. Woodchip path. If you have a source of woodchip this is great. It shouldn’t get muddy and when you want a change, the woodchip will just rot down and add organic matter to your soil.

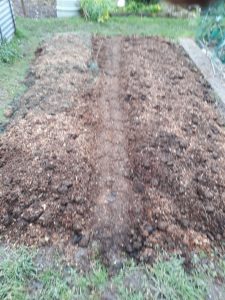
Clear ground for woodchip
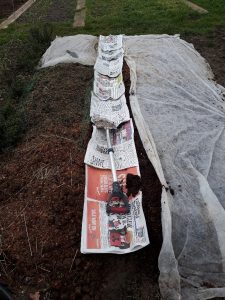
Lay newspaper layer for woodchip path
Woodchip path

4. Gravel. The weed-proof layer here is black plastic (old compost bags work well!). Clear the ground,  lay the plastic with a few drainage holes to prevent pools of water developing, cover with a layer of gravel. Cost of gravel may be an issue but it is re-usable when you want to take the path up and re-lay it elsewhere.

Before gravel
Gravel path

You will notice that the emphasis throughout is to try to stop the weeds growing thus saving time on weeding. We shall see!’

Sowing Sweet Peas

Everyone loves sweet peas don’t they? A quintessential British summer scent that wafts in the air as you pass their blooms, they also make great cut flowers to bring that scent into your home.

There are two schools of thought as regards sowing sweet peas; they can be sown in the autumn and overwintered thereby allowing you to plant out stronger and bigger plants in the spring, or they can be sown later in spring itself either in pots, or if you are really late you can direct sow them in the ground as late as April.

If you are sowing them in the autumn, the growing tip will need to be pinched out to encourage secondary growth and to stop the plants getting too leggy.

As I forgot to sow mine in the autumn and with my sowing fingers starting to get a little twitchy, I have sown mine in mid January this year. I have a selection of colours and varieties. I’m pretty sure I had some lovely red ones too somewhere, but can I find them?

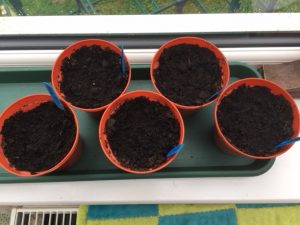
The seeds themselves are quite large and round and are easy to sow as a result. I filled some pots with compost the day before I needed them and brought them inside so the compost warmed up a bit. No one, not even a tiny seedling, wants to dip their toe or first shoot into cold compost!

Sweet pea seeds

I sow mine five seeds to a pot spread evenly over the surface, I then just push them in about a fingernail’s depth and then cover them. Water and place the pots somewhere fairly warm to help germination.

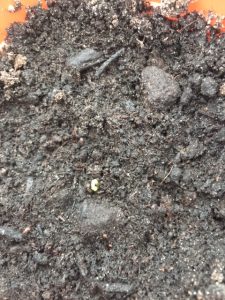
Hey presto! A week later the first seed has germinated!

Germination!

We’ll do an update in a month or two once the seedlings have got going a bit more.

The ‘No Dig’ Diary – January 2018

Members may or may not have heard of this method of growing veg which has been espoused by Charles Dowding.
Clothall Road tenant, Annie, tells us more about it as we follow her on her ‘no dig’ journey.

‘I joined the library just before Christmas – I wanted learn more about pruning. What I found, was a book on compost. I like making compost. It’s very satisfying on so many levels. Perhaps that’s another diary thread for another time……but the compost book contained a chapter about no-dig gardening. How could that fail to catch the eye? That would be the best gardening revolution ever!
Several hours with Mr. Google followed, plus the chance arrival of an assortment of cardboard, and a few hours of free time over the Crimbo Limbo period. Fate decreed this was definitely worth a try.

Rather than try and convert the sceptics with technical persuasion (that can appear in later episodes), I shall just explain what I’ve done so far. Suffice it to say, ‘no-dig’ seems to mimic natural processes and therefore cannot be ‘wrong’.

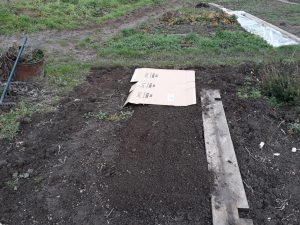
One benefit of no-dig is to reduce weeding and the first step towards this is ‘sheet mulching’. I raked over a patch of ground (you can take out deep-rooted weeds if you like but this isn’t essential). Then I spread cardboard over the area. You can wet the cardboard but the ground right now is probably wet enough! Newspaper can be used instead of cardboard.

Raked earth is covered with cardboard

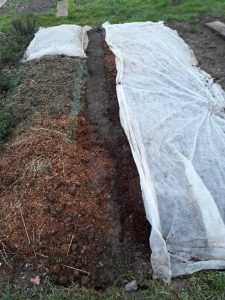
Then I covered the cardboard with a thick layer of compost (about 3 inches). I guess you could leave it at that, but in my garden the birds fling compost all over the place, so I covered the compost with whatever I could find – some bits of fleece, and old pea netting.

Cover the cardboard with mulch

You could use black plastic but that would also keep the rain off. Aims of this mulching are twofold,  firstly the mulch prevents light getting to weeds thus eventually killing them and secondly mulch gradually decomposes and is drawn down into the soil by worm activity.

Next time I shall explain ‘the path dilemma’ and hopefully tell what my solution will be.’

Autumn Working Parties – Part Two

The second working party this autumn was held at the Clare Crescent site in Baldock where we had planted seed potatoes on the last cultivated plot at this site in the spring.  This site is still managed by North Herts District Council.

A very loose experiment was run to see which half of it would produce the more tubers with half the plot being ridged up in the traditional way and the second half just dropping the seed potatoes in holes.

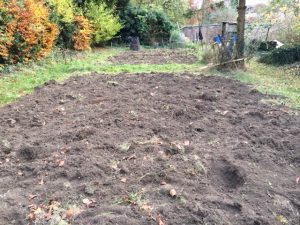
The ridged half after harvesting
Treasure hunting in the non-ridged half

Although hardly scientific, the ridged half of the plot produced the best yield by a long way with very little being harvested from the non-ridged part. In fact it was more like trying to find where the rows of potatoes were on this half! Underground tree roots may have had something to do with it too though…

Surplus potatoes from the plot are being donated to Baldock’s Community Centre to help feed those in need this Christmas.

All done!

We’d love to have more volunteers help on working parties. They are a great way of building camaraderie and giving something back to the allotment association. The more we can do by members volunteering, the more money we can save from having to call experts in to do work which we could have done ourselves. ‘Banked’ volunteer hours are also used when applying for grants for future improvement work to our sites.

So keep an eye out for the next working parties and come and join in!